English
 Français
 Tiếng Việt

Content
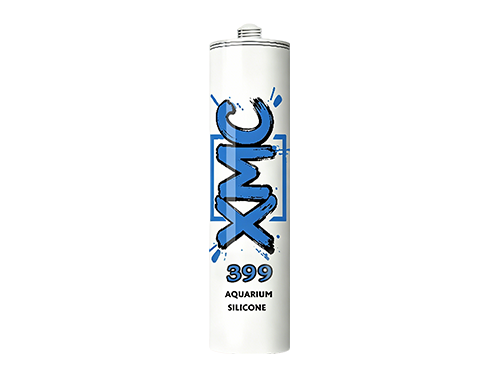
Every seam in a glass aquarium depends on one thin bead of material to keep hundreds of liters of water contained. That bead is not just a mechanical bond, it is also in constant, permanent contact with the water your fish breathe and the water column your invertebrates and plants live in. This is why the formulation of the sealant, not just its stickiness or price, is the detail that actually determines whether a build is safe for long-term stocking.
Key takeaway: A sealant that bonds glass well is not automatically safe for livestock. Safety depends on what is left inside the cured silicone after the curing reaction finishes, not on how strong the bond feels.
This guide breaks down the practical differences between aquarium silicone sealant and general-purpose formulas, how to read a label correctly, how to apply a bead that will not fail at the seam, and how long a joint actually needs before it is safe to fill.
The label "silicone" covers a wide range of products. Bathroom and kitchen sealants, construction-grade adhesives, and aquarium sealants can all be built on a similar base polymer, but they are rarely built the same way underneath. The additive package is where the risk lives.
| Attribute | 100% Pure Silicone | Regular / General-Purpose Silicone |
|---|---|---|
| Fungicides / biocides | Absent | Frequently added to resist mold in wet rooms |
| Fillers and extenders | Minimal to none | Common, used to reduce cost per tube |
| Curing byproduct | Acetic acid (vinegar-like odor) | Varies, some release oximes or other byproducts |
| Labeling | Explicitly states 100% silicone, no additives | Often labeled only as "silicone sealant" |
| Intended use | Aquariums, terrariums, potable water contact | General household and construction sealing |
The practical issue is not that regular silicone is a poorly made product. It performs exactly as intended for its target use, which is usually a bathroom or window frame. The problem is that fungicides and certain fillers are formulated to slowly leach into a damp environment on purpose, because that is what stops mildew from growing on a shower seal. In a sealed aquarium, that same slow leaching becomes a chronic, low-level toxin exposure for fish and invertebrates.
Reading a tube correctly takes less than a minute, but it is the single most important step in this entire process. Look for these signals before anything is applied to glass.
In practice, hobbyists who have compared builds report that tanks sealed with additive-free silicone and given a full cure period show no observable stress behavior in fish after stocking, while builds rushed through curing or sealed with fungicide-treated product have occasionally been linked to unexplained irritation or lethargy in sensitive species shortly after filling. This is exactly why patience during curing matters as much as the product choice itself.
Not every project has identical requirements. A small nano tank, a large custom-built display, and a sump baffle each place different demands on the sealant.
| Project Type | Priority | Recommended Approach |
|---|---|---|
| Small nano or pico tank | Precision, minimal bead visibility | Fine nozzle tip, thin controlled bead, careful tooling |
| Large custom display tank | Structural load bearing at seams | Full-depth bead, extended cure time before filling |
| Sump baffles and internal panels | Water-tightness over odd angles | Generous bead with tooling into every corner joint |
| Repair of an existing seam | Compatibility with old cured silicone | Complete removal of old bead before applying fresh fish tank safe silicone |
For repairs specifically, silicone does not bond reliably to old, cured silicone once it has fully set and lost its surface tack. Every trace of the previous bead should be scraped away with a plastic blade and the glass cleaned before a new bead is applied, otherwise the new seal only sits on top of the old one rather than fusing with the glass.
The steps below outline the general sequence used for sealing or resealing a glass joint. The process is the same whether the joint is new construction or a repair.
Cure time is the most commonly misunderstood part of the process. A bead can feel dry to the touch long before it has actually finished curing all the way through, and filling a tank too early is one of the most frequent causes of seam failure and leaks.
| Cure Stage | What It Means | Typical Timeframe |
|---|---|---|
| Skin formation | Surface forms a thin film, still soft underneath | 20 to 40 minutes |
| Touch dry | Surface no longer tacky to a light touch | 24 to 48 hours |
| Full cure | Cure reaction has completed through the full depth of the bead | 5 to 7 days, longer for thick beads |
Three factors change how long a bead actually takes to fully cure:
A seam that looks finished after one day is rarely finished underneath. Treating "touch dry" as "ready for water" is the most common mistake in DIY aquarium builds.
Bonding strength depends as much on preparation and technique as it does on the sealant itself. The list below separates habits that protect a seam from habits that quietly weaken it over time.
Not safely. Many clear sealants sold for household use contain fungicides or fillers that are not intended for constant water immersion. Look specifically for a formula labeled 100% silicone with no additives before using it on a tank.
A full cure of five to seven days is a safe general target for standard bead thickness, with longer waits recommended for thicker structural joints or larger builds.
No, that smell is a normal sign of acetic acid release, which is typical of the curing process for genuine 100% silicone formulas.
It is not recommended. Fully cured silicone does not bond well to new silicone, so old material should be completely removed before resealing a joint.
Performance is generally similar as long as the base formulation is still 100% silicone with no added fungicides, since color pigment alone does not change curing chemistry or bonding strength.